From the devasting floods caused by rainfall that swept through Eastern Kentucky and Jackson, MS, this year to the 150% increase in high tide flooding caused by climatological changes and sea level rise in the eastern U.S. and Gulf states, flooding is on the rise across America. Left in the wake of those devasting floods is muck, muddy flotsam, and debris. For most homeowners, so much destruction, so much mess, remains that they have no idea where to start. Just clearing the rubble can be daunting.
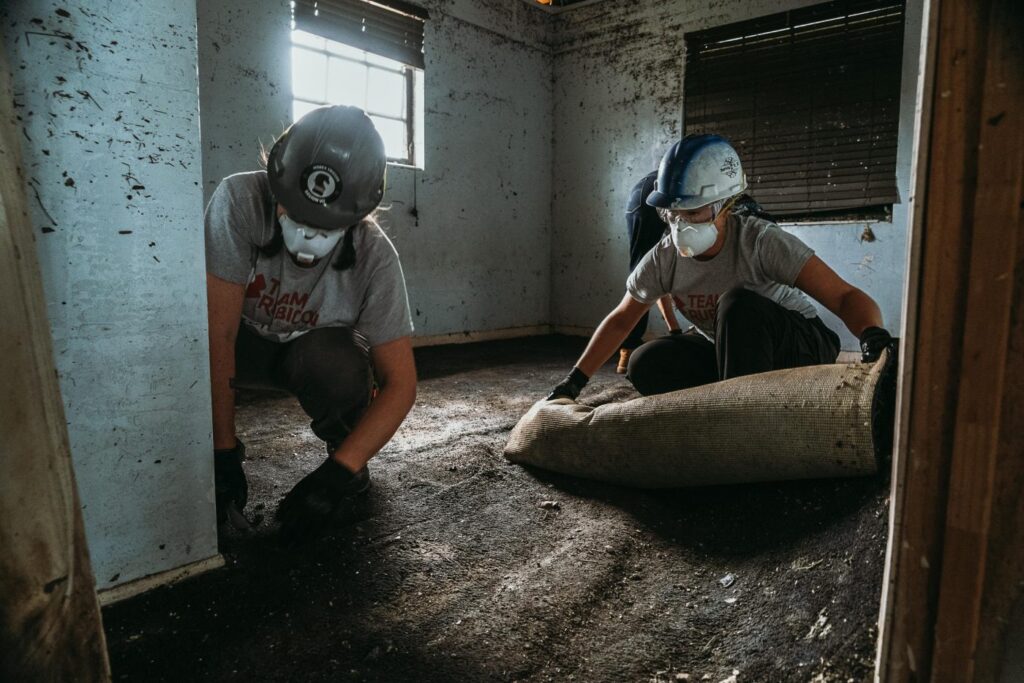
With thousands of muck outs under their belts, Team Rubicon’s volunteers—or Greyshirts—have learned a thing or two about how to clean up after a flood. Here are five steps to begin the flood recovery process.
Perform a Site Safety Survey
The danger of floods is obvious, but often the danger lingers after the water has receded. Before entering the home, scout the property for safety concerns.
First, look up. Floods can leave debris precariously perched on tops of houses and in trees, watch carefully for these deadly scraps, they can fall at any time.
Next, ensure the utilities are off. Assume downed wires are live and stay away from them. Check with the power company on the neighborhood’s status if unsure. If gas is smelled, leave the area immediately.
Finally, check for structural damage. Look for bent walls, crooked window frames, walls with cracks or holes, drooping struts or roofs, damaged or absent support columns, or any sign that the foundation, basement, or crawlspaces have been weakened. If any of these are present, call a professional safety inspector and don’t enter until it has been declared safe.
Get Equipped with Personal Protection
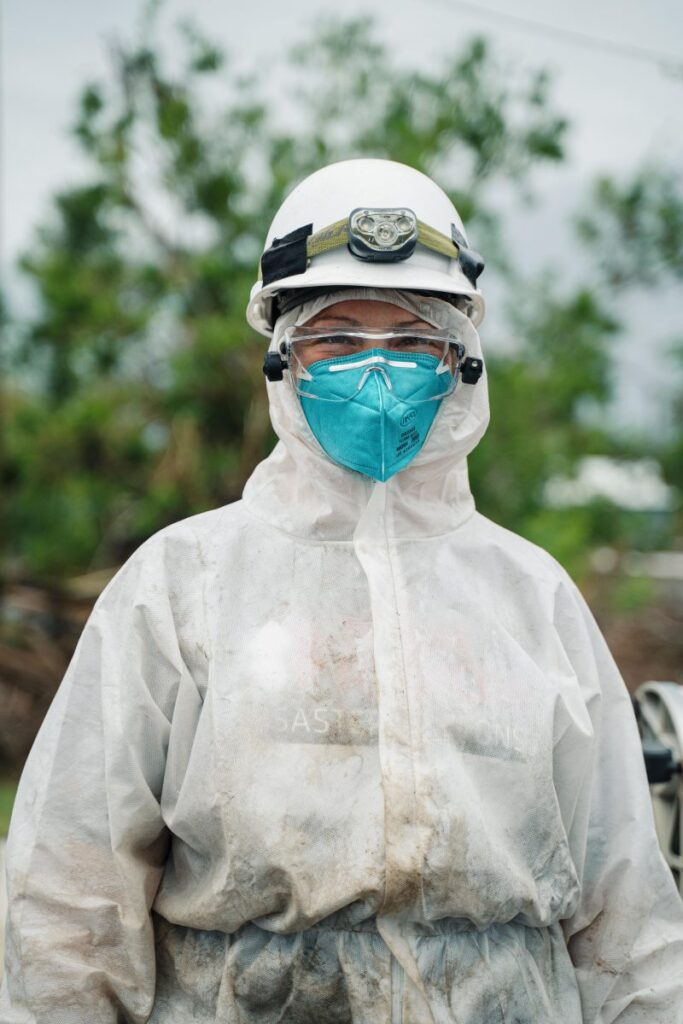
Any Team Rubicon volunteer team leader can explain that the most important thing while cleaning a flood-ravaged house is safety. Working on a disaster response operation is dangerous, but it can be done safely, which starts with the right equipment and clothing.

When performing a muck out or beginning to clean up after a flood, Greyshirts wear sturdy, durable, tear-resistant pants and heavy duty, high-ankle, comfortable boots with a protected toe area; essential garments for safely clearing out a house.
Cleaning up after a flood will be a slimy job; handling potentially hazardous substances and fluids that the flood deposited inside the home—and onto everything in it—requires a pair of tough, high dexterity gloves that will protect your hands from small cuts, infections, and general grossness.
The risks of falling or being hit by flying objects while clearing out a house demand a hard hat and proper eye protection. Prescription glasses are insufficient, get a pair of safety goggles and always wear them while working.
Should mold be detected inside, you will need respiratory protection in the form of face masks, specifically an N95 or N100 paper mask. Below is a fuller description of the dangers of mold but just know the five Ds: replace any mask that is Dirty, Damaged, Damp, Deformed, or Difficult to breathe in.
Before You Clean Up After a Flood, Remove Standing Water
After conducting a site survey and donning the appropriate protective gear, enter the home.
Start by opening all the windows to ventilate the building. Remove any standing water with a sump pump before hauling flood debris outside. Assume any standing water in the home is contaminated, so use a stick or other long object to probe for hazards obscured by the water.
A fan may hasten the drying process, but if any wastewater—like sewage—is present it can contain airborne pathogens that you do not want circulating in the work area. If sewage is inside, do not use a fan.
Remove Doors and Hazards
Once the water has been pumped out, detach and set aside any exterior doors you’ll be dragging debris through to protect them from damage and to clear the workspace. After making sure the entry and exit doorways are unobstructed, clear the floors of any tripping hazards.
If debris removal takes longer than one day—as it likely will—replace the doors at the end of the work day to provide at least some security for the property.
Clean, Protect, or Discard Items in Home
Protect any household items, furniture, or floor areas that escaped damage with plastic sheeting, or move them to a safer location. Larger items, especially furniture and cabinets made of solid wood, stone, or metal, are often salvageable. Window and door frames, floor trimming, and other objects made from hard plastics or wood may also be cleaned and reused.
Once everything that can be salvaged has, begin the muck out process by discarding ruined items. The general rule is that anything made of absorbent or porous materials contaminated by floodwater should be discarded. This includes anything built with or containing pressboard, plywood, or particleboard—including furniture—as well as carpets, curtains, couches, or basically any fabrics. All food items touched by floodwater should be thrown out.
Remove Drywall, Insulation, Flooring, and Water-Damaged Infrastructure
Much of the internal infrastructure of the house may need to be removed because it contains moisture-vulnerable materials, like drywall or sheetrock, soft-wood flooring, hollow-core doors, and insulation.

To remove inundated household material, like drywall or insulation, a utility knife and permanent marker will be useful, along with a pry bar. On the contaminated sections, use draw a horizontal line about one foot above the visible watermarks or at the drywall seams, whichever is higher. Cut that line with the utility knife and remove the resulting pieces with the prybar.
Take Debris to the Curb for Removal
Most communities provide debris removal services after a disaster. And while debris disposal rules may vary in every state, it’s a safe bet to organize all debris into six distinct categories: vegetation (branches, leaves, etc.), household garbage (cardboard, food, etc.), construction debris (lumber, drywall, etc.), large appliances (washers, fridges, etc.), electronics (computers, TVs, etc.), and household hazards (oil, batteries, etc.)
Put the debris piles on the curb and take care not to block access to the street, sidewalks, mailboxes, electric or water meters, fire hydrants, or storm drains.
Conduct Mold Remediation
Mold, often called “black mold,” is routinely encountered by Greyshirts during flood disaster responses. The name is misleading, however, as dangerous mold comes in all colors. The important thing to remember is that if mold is found inside, anyone with immune system disorders or lung conditions, including COPD or asthma, should not go inside until it has been cleaned.
Mold grows in moist areas but drying the surface will not eradicate it. In fact, drying the area may spread mold spores, the actual hazardous part of mold, even farther through the house. Just like sewage, if mold is observed in an area of the house, DO NOT use fans in that area. Be sure to wear an N-95 face mask or N-100 paper mask along with a full Tyvek suit if any work must be done there.
Mold-contaminated areas of fewer than 10 square feet can be cleaned with a bleach solution applied with a common garden sprayer. Mix 2 cups of ordinary household bleach with 2 gallons of water and gently spray over the entire surface area where mold is present. The bleach solution needs to penetrate below the surface, so soak it well and leave it to sit for a minimum of 4 hours. If subsurface areas, such as beneath flooring or behind drywall, are mold-contaminated the mold has likely spread farther than can be easily seen. If so, or if mold is discovered in areas over 10 square feet, the homeowner will likely need to call professional contractors.
Clearing flood-damaged homes of interior debris is an essential first step to cleaning up after a flood and repairing or rebuilding a house. Once the home has been mucked, walls and floors have been dried, and contaminated debris has been removed, rebuilding can begin. Getting to that point requires patience: don’t panic. Following these our eight steps for cleaning up after a flood can expedite the process, and help safely return you to your home, sooner.


